

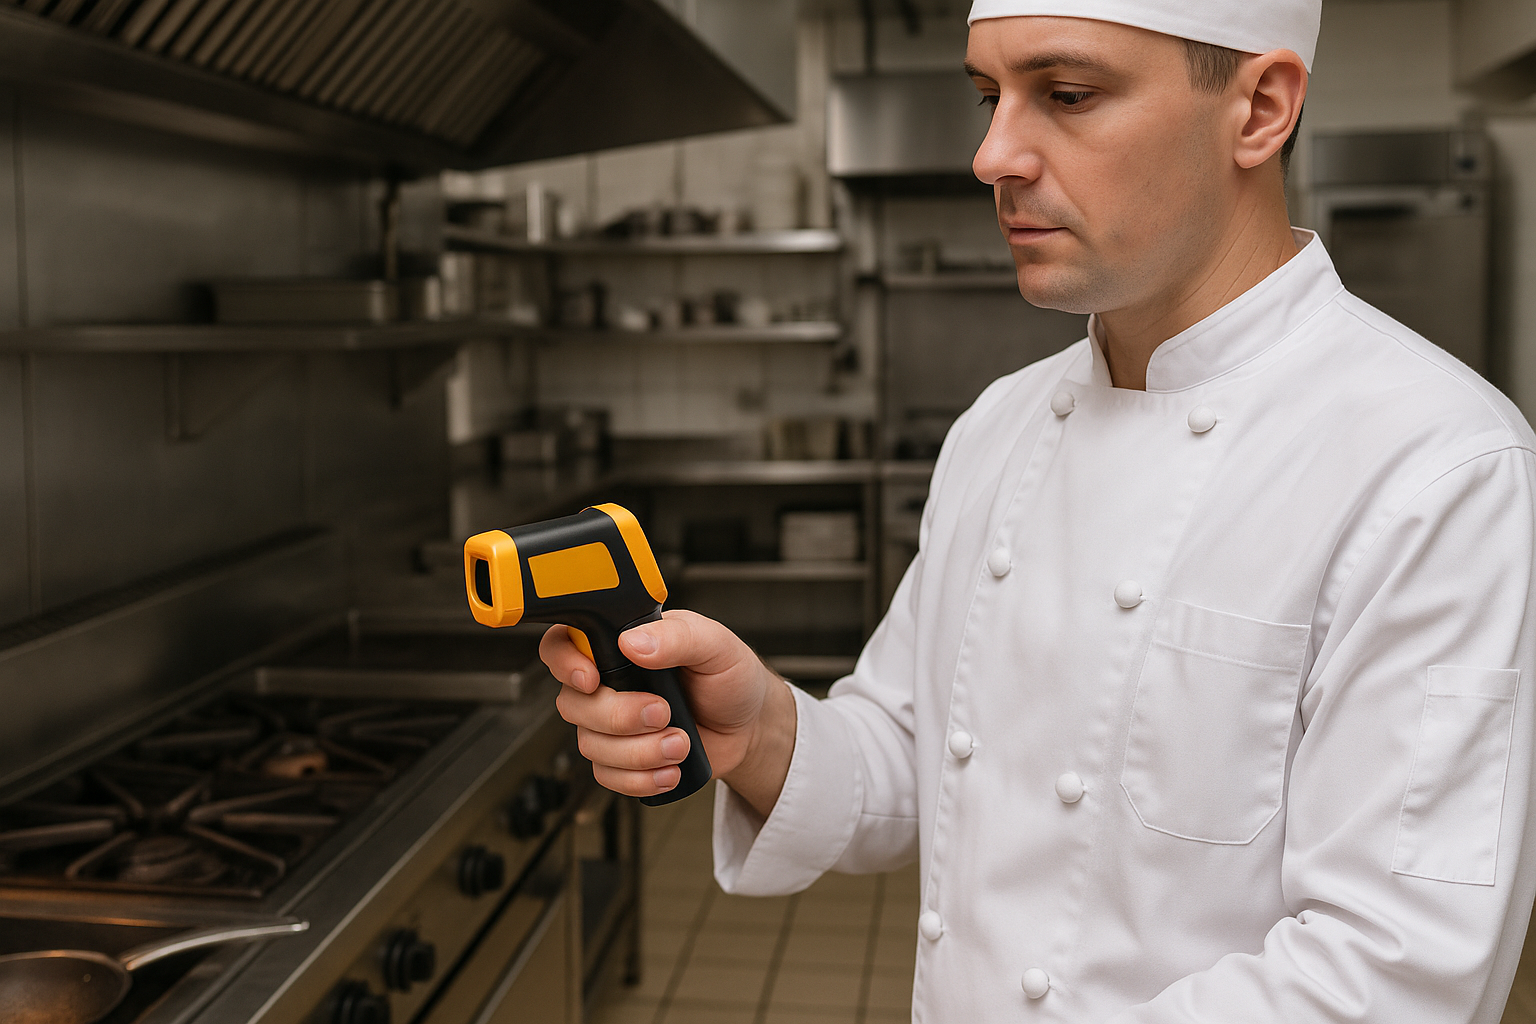
Infrared gun thermometers have become essential tools in commercial kitchens, food safety inspections, and industrial environments across Australia. They provide quick, contactless surface temperature readings that help ensure food safety compliance, equipment performance, and operational efficiency. However, incorrect usage often leads to inaccurate measurements that can compromise safety standards.
This comprehensive guide explains how to properly use an infrared gun thermometer, shares best practices for precision, and helps you avoid the most common reading errors.
Key Takeaways
- Infrared thermometers measure surface temperature only, not internal food temperature
- Distance-to-spot ratio determines measurement accuracy and area coverage
- Reflective surfaces require tape or matte coating for reliable readings
- Multiple readings across different points ensure consistency
- Regular lens cleaning maintains sensor accuracy
What Is an Infrared Gun Thermometer?
An infrared gun thermometer measures surface temperature by detecting infrared radiation emitted from objects. Unlike traditional probe thermometers, these devices provide instant, non-contact readings without touching the surface being measured.
These tools prove particularly valuable when you need to:
- Measure hot or hazardous surfaces safely without physical contact
- Monitor holding temperatures across multiple dishes in busy food service environments
- Check cooking equipment surface temperatures quickly during service
- Verify refrigeration unit performance without opening doors
Understanding Distance-to-Spot Ratio
The distance-to-spot ratio (D:S) is the most critical specification for accurate infrared temperature measurement. This ratio determines the size of the area being measured based on your distance from the target.
For example, a 12:1 ratio means that at 12 inches away, the thermometer measures a circular spot approximately 1 inch in diameter. At 24 inches, that spot doubles to 2 inches.
| Distance from Surface | Measurement Spot Size (12:1 Ratio) | Best For |
|---|---|---|
| 6 inches | 0.5 inch diameter | Small items, precise spots |
| 12 inches | 1 inch diameter | General kitchen use |
| 24 inches | 2 inch diameter | Large surface areas |
| 36 inches | 3 inch diameter | Too far for accuracy |
Step-by-Step Guide: How to Use an Infrared Gun Thermometer
1. Read the Manufacturer's Instructions First
Every infrared thermometer model has specific operational requirements. Review your device's manual to understand its distance-to-spot ratio, emissivity settings, laser targeting function, and measurement range before first use.
Different brands calibrate their devices differently, and understanding these specifications prevents measurement errors from the start.
2. Ensure the Surface Is Suitable for Measurement
Infrared thermometers work most accurately on non-reflective, matte surfaces. Shiny materials like polished stainless steel, chrome finishes, or glossy ceramics reflect infrared radiation instead of emitting it, causing false readings.
To measure reflective surfaces accurately:
- Apply a small piece of masking tape to the measurement spot
- Wait 30-60 seconds for the tape to reach the surface temperature
- Measure the tape instead of the reflective surface
- Alternatively, use a matte black marker on non-food surfaces
3. Maintain the Correct Distance
Position yourself at the optimal distance based on your thermometer's D:S ratio and the size of the target area. Too far away increases the measurement zone, potentially including surrounding surfaces with different temperatures.
For small items like individual ramekins or plated dishes, stay closer. For large surfaces like griddles or warming trays, you can measure from slightly farther away.
4. Hold the Thermometer Steady
Point the laser at the exact spot you want to measure and keep the device still during the reading. Movement during measurement can cause the sensor to pick up temperatures from multiple areas, averaging them inaccurately.
Pull the trigger and wait for the reading to stabilize, typically within 1-2 seconds.
5. Allow Surfaces to Stabilize
Don't measure immediately after moving equipment, stirring food, or opening oven doors. Surface temperatures need a few seconds to stabilize after disturbance.
This is especially important when checking bain maries, hot holding equipment, or items just removed from heat sources.
6. Take Multiple Readings for Accuracy
Single measurements can miss hot or cold spots. For reliable temperature monitoring:
- Scan at least three different points across the surface
- Focus on edges, centers, and corners of larger items
- Record the average temperature for documentation
- Note any significant temperature variations that indicate uneven heating or cooling
7. Adjust Emissivity Settings When Available
Higher-end infrared thermometers allow emissivity adjustment based on material type. Emissivity measures how efficiently a surface emits infrared radiation, with values ranging from 0 to 1.
Most organic materials (food, wood, plastic) have emissivity around 0.95, which is the default setting on most devices. Metals typically range from 0.1 to 0.5 depending on finish and oxidation.
| Material Type | Typical Emissivity | Kitchen Examples |
|---|---|---|
| Organic materials | 0.92–0.96 | Food, wood, plastic, rubber |
| Painted/oxidized metal | 0.80–0.95 | Powder-coated equipment |
| Matte ceramics | 0.90–0.95 | Plates, serving dishes |
| Polished metal | 0.10–0.30 | Stainless steel pans, chrome |
8. Keep the Lens Clean
The infrared sensor lens must remain clean for accurate readings. Dust, grease, moisture, and food residue can block or scatter infrared radiation, causing measurement errors.
Clean the lens regularly with a soft, dry microfiber cloth. For stubborn residue, use isopropyl alcohol on the cloth, never directly on the device. Avoid abrasive materials that could scratch the lens.
Best Practices for Commercial Kitchen Use
What Infrared Thermometers Can and Cannot Do
Infrared gun thermometers excel at surface temperature monitoring but have important limitations in food service applications. Understanding these boundaries ensures proper food safety compliance.
Ideal uses include:
- Checking holding temperatures of food on serving lines
- Monitoring surface temperatures of cooking equipment like char grills and cooktops
- Verifying refrigerator and freezer exterior temperatures
- Quick screening of delivered goods
- Monitoring hot holding cabinet performance
Never rely on infrared readings alone for:
- Internal cooking temperatures of meat, poultry, or seafood
- Core temperatures during cooling processes
- Verifying food safety in thick or dense items
- Measuring liquids (surface only shows top layer temperature)
Maintaining Measurement Consistency
Consistent technique produces consistent results. Establish standard procedures for your team:
- Always measure from the same distance for comparable readings
- Use the same angle of approach each time
- Document your measurement protocol in food safety procedures
- Calibrate or verify accuracy regularly according to manufacturer guidelines
- Replace batteries before they run completely flat to maintain accuracy
Environmental Considerations
External factors can affect infrared thermometer accuracy. Be aware of:
- Strong air currents from ventilation systems or open doors
- Direct sunlight or intense lighting heating surfaces
- Extreme ambient temperatures affecting the device itself
- High humidity creating condensation on surfaces or lenses
Allow thermometers to acclimate to room temperature before use if they've been stored in significantly different conditions.
Common Mistakes to Avoid
Even experienced kitchen staff make these frequent errors when using infrared thermometers:
- Measuring through glass or plastic: These materials block infrared radiation. Always measure directly, never through barriers.
- Ignoring background temperature: Measuring small items against hot or cold backgrounds can skew readings.
- Assuming internal temperature matches surface: Surface and internal temperatures can differ by 10-20°C or more.
- Measuring immediately after equipment startup: Equipment needs time to reach stable operating temperatures.
- Neglecting regular cleaning: Dirty lenses progressively reduce accuracy over time.
When to Use Probe Thermometers Instead
Probe thermometers remain essential for accurate internal temperature verification. Always use probe thermometers when:
- Checking if meat, poultry, or seafood has reached safe cooking temperatures
- Monitoring cooling processes for food safety compliance
- Measuring internal temperatures of thick items like roasts or casseroles
- Verifying actual food temperature rather than serving dish temperature
- Documenting temperatures for HACCP records requiring core temperature data
Many commercial kitchens use both types: infrared guns for quick surface screening and probe thermometers for verification and compliance documentation.
Quick Reference: Infrared Thermometer Accuracy Checklist
- Clean lens before each shift
- Verify distance-to-spot ratio for your target size
- Check surface is non-reflective or apply tape if needed
- Hold device steady at correct distance
- Allow surfaces to stabilize before measuring
- Take multiple readings across the area
- Document results according to food safety procedures
- Follow up with probe thermometer when required
Choosing the Right Infrared Thermometer
When selecting an infrared gun thermometer for your commercial kitchen, consider:
- Temperature range: Ensure it covers your needed range, typically -20°C to 300°C for most kitchen applications
- Distance-to-spot ratio: Higher ratios (12:1 or 15:1) offer more flexibility for various distances
- Response time: Faster response (under 1 second) improves workflow efficiency
- Accuracy specification: Look for ±1-2°C accuracy for food service use
- Adjustable emissivity: Useful if measuring various material types regularly
- Display features: Backlit displays, max/min/average functions, and hold features add convenience
Ensure Accurate Temperature Monitoring in Your Kitchen
Infrared gun thermometers provide valuable quick-check capabilities for surface temperature monitoring when used correctly. By understanding distance-to-spot ratios, accounting for surface properties, maintaining consistent technique, and knowing when to switch to probe thermometers, you can ensure accurate and reliable readings that support food safety and operational efficiency.
Remember that these devices complement rather than replace traditional temperature monitoring methods. Combined with proper probe thermometer use and documented procedures, infrared thermometers become powerful tools for maintaining the highest standards in your commercial kitchen.
Browse our complete range of thermometers and timers to find the right temperature monitoring tools for your kitchen, or explore our full selection of benchtop equipment to outfit your commercial kitchen with reliable, professional-grade tools.


