


News

🦟 How to Reduce Flies in Your Venue This Summer: Helpful Tips + Why Apuro Bug Zappers Are a Must-Have
As temperatures rise, so does fly activity — and in hospitality settings, flies can quickly affect comfort, hygiene, and customer satisfaction. The good news is that with simple preventative steps and the right equipment, you can significantly reduce fly problems.Below, we cover helpful tips to reduce flies, explain how Apuro Bug Zappers work, and highlight their major benefits for cafés, restaurants, bars, clubs, and commercial kitchens. Helpful Tips to Reduce Flies in Your Hospitality Venue Keeping flies out requires a combination of cleanliness and smart environmental control. Here are the best strategies: 1. Keep Surfaces Clean and Dry Flies are attracted to food scraps, sugars, and spills. Clean workspaces frequently Sanitise counters throughout service Cover sweet foods and fruit displays Internal link suggestion:View our Cleaning Supplies Range 2. Manage Waste Properly Flies breed rapidly in exposed rubbish. Use sealed-lid bins Empty bins before they overflow Store waste away from dining areas 3. Improve Door and Window Control Install door closers Use mesh screens or air curtains Keep outdoor dining waste-free 4. Store Food Correctly Keep food covered Refrigerate ingredients when not in use Use sealed containers for pastries, bread, and fruit 5. Install an Effective Fly-Control Device This is where Apuro Bug Zappers provide major value. Shop Apuro Bug Zappers How Apuro Bug Zappers Work Apuro Bug Zappers use high-intensity UV light to attract flying insects. Here’s what happens: The UV light draws flies and insects toward the unit They reach the internal electric grid They are instantly neutralised The insect remains fall into an easy-clean collection tray This provides chemical-free, food-safe, continuous protection. External reference on UV fly control:https://www.health.nsw.gov.au/environment/factsheets/Pages/insect-control.aspx Benefits of Apuro Bug Zappers for Hospitality Venues 1. Commercial-Grade Strength Built for cafés, restaurants, clubs, pubs, and commercial kitchens.Designed for long service hours with consistent performance. 2. Quiet and Odour-Free Operation No chemical smells or distracting buzzing.Ideal for dining rooms and open-service areas. 3. Low Maintenance The removable tray makes cleaning quick and simple.Perfect for fast-paced hospitality environments. 4. Chemical-Free Fly Control No sprays, no fumes, and no contamination risk.Safe for all food-preparation areas. 5. Available in Multiple Sizes Apuro units come in Small, Medium, and Large to suit any venue: Counters and prep areas Dining rooms Outdoor patios Bars and clubs Commercial kitchens 6. Simple “Plug and Forget” Operation Easy installation and dependable performance all summer long. Internal link suggestion:Browse All Pest-Control Equipment → /pest-control Frequently Asked Questions (FAQ) 1. Do Bug Zappers help reduce flies in hospitality venues? Yes. Bug zappers significantly reduce flying insects, especially when combined with proper sanitation and food storage practices. 2. Are Apuro Bug Zappers safe to use near food? Yes. They use UV light and contain no chemicals or sprays, making them safe for commercial kitchens. 3. What size Bug Zapper should I choose? Small: ideal for counters and takeaway stores Medium: ideal for cafés and small restaurants Large: ideal for dining rooms, clubs, bars, and commercial kitchens 4. How often should I clean the Bug Zapper? Most venues clean them weekly. High-traffic kitchens may choose to clean them more frequently during peak season. 5. Can Bug Zappers be used outdoors? Many Apuro models are suitable for indoor and sheltered outdoor use. Always check individual product specifications. 6. Do Bug Zappers attract more insects into the venue? No. They attract insects only within their immediate range, helping eliminate them before they reach food or customers. Keep Flies Away This Summer With Hospitality Connect A clean venue paired with Apuro’s reliable bug-control technology will reduce fly activity and create a more enjoyable dining experience. Whether you operate a busy restaurant or a small café, an Apuro Bug Zapper helps maintain a professional, fly-free environment.
Read moreNews

New Commercial Kitchen Equipment Trends Transforming Australian Hospitality
Discover New Commercial Kitchen Equipment Trends Transforming Australian Hospitality and see how smart, sustainable tech boosts speed, savings, and flavor.

Food Processor vs Blender: What’s Better for Your Commercial Kitchen?
Is a food processor the same as a blender? Absolutely not, and understanding the difference between a commercial food processor and a commercial blender will save your kitchen time, money, and valuable bench space. In commercial kitchens across Australia, it’s common to confuse the two appliances. Both machines have blades and both process food, but they are engineered for very different tasks. At Hospitality Connect, we help chefs, café owners, caterers, and restaurant operators choose the right commercial kitchen equipment. Whether you’re considering premium Dito Sama food processors, heavy-duty Blendtec commercial blenders, or both, we’ll guide you through which tool suits your workflow. Quick Summary for Busy Chefs Food processor = solids, batch prep, slicing, dough, shredding. Blender = liquids, smoothies, sauces, soups, frozen beverages. In commercial kitchens: these tools are not interchangeable. Dito Sama excels at solid-ingredient prep. Blendtec leads in high-speed liquid blending. The most efficient kitchens use both, each in its own workstation. Commercial Food Processor vs Commercial Blender: The Core Difference Food Processors (e.g., Dito Sama) handle slicing, grating, kneading dough, chopping, and large batch prep of solid ingredients. Blenders (e.g., Blendtec commercial models) are ideal for soups, smoothies, sauces, nut milks, cocktails, and anything liquid or semi-liquid. If you have the space and budget, having both a commercial food processor and a commercial blender will save prep time, reduce labour, and improve consistency. What Is a Commercial Food Processor? A commercial food processor is designed specifically to handle solid ingredients quickly and efficiently. Think of high-volume tasks like chopping vegetables, grating cheese, slicing potatoes, pureeing fillings, or mixing pastry and pizza dough. Brands like Dito Sama specialise in processors engineered for continuous professional use — delivering uniform results, consistent output, and minimal waste. For example: the Dito Sama Cutter Mixer 4.5 L Variable Speed is built for heavy-duty commercial prep work. These machines suit bakeries, hospitals, cafés, restaurants, and catering facilities needing large batch production. What Is a Commercial Blender? A commercial blender is built to mix and break down liquids and semi-liquids at high speed. It’s ideal for smoothies, purées, creamy soups, nut milks, cocktails, and frozen fruit blending. Blendtec is a leading name in commercial blending, known for motor power, reliability, and long service life. For example: the Blendtec Stealth 885 includes a sound enclosure, exceptional power, and pre-programmed cycles optimised for high-volume commercial use. Choose a commercial blender when your workflow relies on liquid blending, frozen beverage prep, or front-of-house drink service. Key Differences: Food Processor & Blender Comparison Feature Commercial Food Processor Commercial Blender Texture & Consistency Chunkier results (veg, cheese, dough) Smooth, fluid results (soups, smoothies) Liquid Handling Limited to small liquid volumes Excellent for liquids, frozen blends Blade / Disc Type S-blades, slicing & shredding discs Cross-blades, vortex jar action Motor / Speed / Control High torque, controlled speeds Very high speed, preset cycles Attachments & Versatility Multiple discs/attachments One jar + lid, fewer attachments Best for Batch Prep Solids and doughs Liquids and sauces Ease of Cleaning More parts to wash Fewer parts, fast cleaning Noise Level Low to moderate Higher unless sound enclosure Durability & Maintenance More mechanical components Motor-focused maintenance Which Commercial Tool Should You Use in Your Kitchen? Cafés & Juice Bars A heavy-duty commercial blender (Blendtec) is essential for frozen fruit, smoothies, frappes, and ice-based drinks. A food processor may be optional unless chopping and pastry prep are part of your workflow. Bakeries & Patisseries A commercial food processor (Dito Sama) is essential for dough mixing, nut chopping, cheese grating, pastry prep, and bulk solid prep. A blender may help with liquid fillings but is secondary. Catering Businesses Most caterers benefit from both — processors for bulk solid prep and blenders for sauces, purées, and emulsions. Compact models are ideal for mobile setups. Restaurants Back-of-house: Food processors for slicing, shredding, chopping, and dough work. Line or service area: Blenders (or immersion blenders) for sauces, soups, and finishing tasks. Bar: Blenders for cocktails, cocktails, and milkshakes. Use Dito Sama for prep, Blendtec for blending. How to Choose the Right Commercial Kitchen Tool Your workflow tasks: solids vs liquids. Batch volumes: large prep batches vs small service batches. Space & budget: processors for versatility, blenders for liquid-heavy menus. Attachments & support: Dito Sama offers many discs; Blendtec offers high reliability. Cleaning & hygiene: processors have more parts; blenders clean faster. Durability: consider motor power, torque, and daily usage volume. In many commercial kitchens, the smartest investment is to use both appliances. Matching the tool to the task improves efficiency, consistency, and overall service speed. Top Picks: Best Commercial Food Processors & Blenders Commercial Food Processor Picks Dito Sama Cutter Mixer 4.5 L Variable Speed — heavy-duty build, precision cutting. Dito Sama Cutter Mixer 5.5 L 2-Speed — larger capacity for bulk production. Commercial Blender Picks Blendtec Stealth 885 — sound enclosure, high power, versatile programming. Blendtec Chef 600 — affordable, high-value option for cafés. Conclusion: Matching the Appliance to the Commercial Job A food processor and a blender are not interchangeable. Use a food processor for solids, chopping, slicing, dough, and bulk prep. Use a blender for liquids, drinks, sauces, and frozen mixes. The most efficient kitchens use both, each in its optimal job zone. For Australian hospitality operators, consider Dito Sama for prep and Blendtec for blending. Ready to upgrade? Explore our full range of Commercial Food Processors & Blenders at Hospitality Connect. Frequently Asked Questions Can I use a blender as a food processor? You can for small tasks, but it’s not ideal. Blenders lack slicing, shredding, and dough capability. High-volume solid prep requires a commercial food processor. What if I don’t have a food processor? You’ll rely on knife skills, graters, or handheld tools. This works for light duties but is slow and inconsistent in commercial settings. Is a NutriBullet a food processor? No. A NutriBullet is a personal blender, not suitable for commercial food processor tasks. What are the drawbacks of a food processor? More attachments to clean, more bench space, and not ideal for liquid-heavy workflows. Can commercial blenders crush ice continuously? Yes — high-end blenders like the Blendtec Stealth 885 are engineered for all-day ice, smoothie, and frozen beverage production. How long should a commercial food processor last? With regular maintenance and correct usage, premium processors (such as Dito Sama) typically offer many years of reliable service in high-demand kitchens.

Classic Christmas Pudding Recipes
Nothing says Christmas quite like a rich, steaming pudding arriving at the table to applause. Whether you’re running a café, restaurant, club or just cooking for a crowd at home, a good Christmas pudding recipe – and the right gear – makes all the difference. At Hospitality Connect in Penrith, we supply Avanti Pudding Trays and Chef Inox Mixing Bowls to help you create perfectly cooked, beautifully presented puddings every time. Shop Avanti Pudding Trays Shop Chef Inox Mixing Bowls Why the Right Cookware Matters for Christmas Pudding Christmas puddings are dense, rich and full of fruit. That means they need: Even heat distribution Gentle, consistent steaming Reliable, sturdy mixing bowls that can handle heavy mixtures Avanti Pudding Trays – Built for Perfect Puddings Avanti Pudding Trays, available at Hospitality Connect, are ideal because they: Are designed specifically for steamed and baked puddings Distribute heat evenly for consistent results Are easy to grease and line, helping your pudding release cleanly Come in multiple sizes for individual serves or family-sized puddings 👉 Internal link idea:Browse Avanti Cookware at Hospitality Connect 👉 External link idea:Learn more about Avanti’s range on the official brand site:Avanti Kitchenware Chef Inox Mixing Bowls – Professional Quality for Heavy Mixes Chef Inox Mixing Bowls, also available from Hospitality Connect, are a favourite in commercial kitchens because they are: Durable and built for commercial use Lightweight yet sturdy – ideal for heavy fruit mixtures Easy to clean and stack Available in multiple sizes, perfect for scaling recipes up or dow Classic Steamed Christmas Pudding Recipe (Perfect in an Avanti Pudding Tray) This classic pudding is rich, moist and packed with flavour – ideal for cafés, restaurants or your Christmas Day dessert at home. Serves 1 large pudding (8–10 serves), or Several smaller puddings depending on the size of your Avanti Pudding Trays Ingredients Fruit Mix: 250 g sultanas 250 g raisins 125 g currants 80 g mixed peel (optional but traditional) 80 g chopped dried apricots or dates 1 small apple, peeled and grated Zest of 1 orange Zest of 1 lemon 150 mL brandy, rum or orange juice (for an alcohol-free option) Pudding Batter: 200 g unsalted butter, softened 200 g brown sugar, firmly packed 3 large eggs 200 g plain flour 1 tsp baking powder 1 tsp ground cinnamon 1 tsp mixed spice ½ tsp ground nutmeg 100 g fresh breadcrumbs 50 g chopped almonds or walnuts (optional) 2–3 Tbsp milk (if needed to loosen mixture) Equipment 1 x large Chef Inox Mixing Bowl 1 x Avanti Pudding Tray with lid (or baking paper/foil cover) Baking paper & foil Kitchen string Large stockpot or saucepan with lid Trivet or small rack for steaming Method: Step-by-Step Christmas Pudding 1. Soak the Fruit (ideally overnight) In a Chef Inox Mixing Bowl, combine: Sultanas, raisins, currants, mixed peel, apricots/dates, grated apple, orange zest and lemon zest. Pour over the brandy, rum or orange juice. Stir well, cover and leave to soak for at least 4 hours, preferably overnight. This gives you plump, juicy fruit and a deeper, more complex flavour. 2. Prepare the Avanti Pudding Tray Grease the inside of your Avanti Pudding Tray with butter or oil. Line the base with a circle of baking paper. Lightly flour the sides if you want extra help with release. 3. Make the Batter In another Chef Inox Mixing Bowl, cream together the softened butter and brown sugar until light and fluffy. Beat in the eggs one at a time, mixing well after each addition. Sift in the flour, baking powder and spices (cinnamon, mixed spice, nutmeg). Fold through the breadcrumbs and nuts (if using). Add the soaked fruit (with any remaining liquid) to the batter and mix thoroughly. If the mixture is very stiff, add 2–3 tablespoons of milk until it slowly drops from the spoon. You’re aiming for a thick but spoonable mixture. 4. Fill the Pudding Tray Spoon the batter into your Avanti Pudding Tray, leaving about 1–2 cm at the top for expansion. Smooth the surface with the back of a spoon and tap the tray gently on the bench to remove air pockets. If your tray doesn’t have a lid: Cover with a layer of baking paper and then a layer of foil. Pleat both in the centre to allow room for rising. Secure with kitchen string around the rim. 5. Steam the Pudding Place a trivet or upside-down saucer in the base of a large pot. Sit the Avanti Pudding Tray on the trivet. Pour boiling water into the pot until it comes about halfway up the side of the tray. Cover with a lid and bring back to a gentle simmer. Steam for 3–3½ hours, checking occasionally to top up with hot water so the pot doesn’t boil dry. You’ll know it’s done when: A skewer inserted into the centre comes out mostly clean, and The pudding feels firm and slightly springy. 6. Rest, Store & Reheat Let the pudding cool slightly in the tray. Turn out carefully onto a plate, or allow it to cool completely in the tray and then wrap. Wrap in fresh baking paper and foil and store in the fridge or a cool place (especially if using alcohol). To reheat on Christmas Day: Steam again for 1–1½ hours until hot through, or Slice and reheat individual portions in the microwave for service. Serve with brandy custard, vanilla custard, cream or ice cream. Mini Christmas Puddings – Ideal for Cafés & Catering Using smaller Avanti Pudding Trays or moulds from Hospitality Connect, you can turn the same mixture into individual puddings. How to Adapt the Recipe Prepare the mixture as above. Grease and line mini Avanti trays or moulds. Fill about ¾ full. Steam for 45–60 minutes (depending on size), rather than 3+ hours. These mini puddings are: Perfectly portioned for dessert menus Easy to plate beautifully Simple to reheat and serve during busy services Why Buy Your Christmas Gear from Hospitality Connect? At Hospitality Connect, we specialise in quality hospitality equipment for commercial and serious home kitchens. From our Penrith showroom at 7/20 Hickeys Road, Penrith, and online store, we offer: Avanti Pudding Trays in multiple sizes Chef Inox Mixing Bowls and utensils Bakeware, cookware, smallwares and more for Christmas and year-round service FAQ – Christmas Pudding, Avanti Pudding Trays & Chef Inox Bowls 1. Can I bake this Christmas pudding instead of steaming it? You can bake it, but traditional Christmas pudding is best steamed for a moist, rich texture. If you do bake: Place the Avanti Pudding Tray in a water bath (bain-marie) in the oven. Bake low and slow (around 150–160°C), checking for doneness with a skewer. Steaming, however, gives the most classic and reliable result. 2. Do I need to soak the fruit overnight? Soaking overnight isn’t strictly essential, but it improves flavour and texture: The fruit plumps up and becomes juicier The flavours of the brandy/juice penetrate more deeply If you’re short on time, try to soak for at least 4 hours. 3. How do Avanti Pudding Trays help? Avanti Pudding Trays are designed for puddings, so they: Distribute heat evenly for consistent cooking Are simple to grease and line for easy turning out Come in sizes that suit both home cooks and commercial kitchens They’re a great choice if you want reliable results and a professional finish. 4. Why are Chef Inox Mixing Bowls recommended? Chef Inox Mixing Bowls are: Strong enough for dense fruit batter Lightweight and easy to handle when mixing large quantities Stainless steel, which doesn’t absorb odours or stains They’re ideal for commercial venues and home bakers who want professional-grade gear. 5. How far in advance can I make a Christmas pudding? Many people make their Christmas pudding several weeks in advance, as the flavours mature over time. If using alcohol and following safe storage practices: Store in a cool, dark place or fridge, well wrapped. Re-steam on the day to heat through. If you’re unsure about long-term storage, you can refrigerate or freeze and then reheat before serving. 6. Can I make this recipe dairy-free or alcohol-free? Yes: Dairy-free: Replace butter with a quality dairy-free margarine or plant-based baking spread. Alcohol-free: Use orange juice or apple juice instead of brandy or rum. The method stays the same; just note the flavour will be slightly different (still delicious!). 7. Where can I buy Avanti Pudding Trays and Chef Inox Mixing Bowls? You can purchase both directly from Hospitality Connect: Visit our showroom at 7/20 Hickeys Road, Penrith, NSW Our team can help you pick the right sizes and quantities for home, café, bakery or restaurant use.

How to Clean a Commercial Ice Machine – And Why Scotsman Ice Machine Cleaner & Sanitiser Is a Game Changer
When customers order a cold drink, they expect the ice to be clean, clear and safe. In a busy café, bar or restaurant, the commercial ice machine works non-stop – but it’s often the most neglected piece of equipment in the kitchen. Without regular cleaning, sanitising and filtration, ice machines can quickly develop slime, mould, scale and bacteria. That puts your hygiene, equipment and reputation at risk. In this guide from Hospitality Connect, we’ll cover: How to clean a commercial ice machine Why Scotsman Ice Machine Cleaner & Sanitiser is ideal for the job What happens if cleaning isn’t done regularly The benefits of using a water filter with your ice machine Why Cleaning Your Commercial Ice Machine Matters Inside an ice machine you’ll find: Constant moisture Changing temperatures Mineral deposits from water Food particles and airborne contaminants All of this creates the perfect environment for biofilm (slime), mould and bacteria. If you don’t clean and sanitise regularly, this can lead to: Off-tasting or smelly ice Cloudy, soft or fast-melting cubes Clogged water paths and drains Reduced ice production Possible food safety issues and health inspection problems Regular maintenance isn’t just “nice to have” – it’s essential for food safety, equipment performance and customer confidence. Step-by-Step: How to Clean a Commercial Ice Machine Always check and follow the instructions in your specific ice machine’s manual. The steps below are a general guide, especially suitable for Scotsman commercial ice machines. 1. Switch off and prepare the machine Discard all existing ice from the bin – don’t reuse it. Turn the machine off and isolate electrical power. Turn off the water supply if the manufacturer recommends it. 2. Remove internal components Take out any removable parts, such as: Water trough Spray bar / distribution tube Curtain or baffle Bin grid (if fitted) Wash these in warm water with a food-safe detergent to remove loose soil, slime and residue. 3. Descale with Scotsman Ice Machine Cleaner Mineral scale from hard water can stick to the evaporator, pipes and bin. This reduces heat transfer, lowers ice output and shortens the life of your machine. Using Scotsman Ice Machine Cleaner: Mix the solution Follow the directions on the label for the correct dilution. Run the clean/descale cycle (if fitted) Many Scotsman machines have a dedicated “Clean” or “Descale” function. Pour the recommended amount of cleaner into the machine’s reservoir and start the cleaning cycle so it circulates through the internal system. Manual descaling (where required) For areas you can reach, use the cleaning solution and a soft cloth or sponge to gently remove scale. 4. Rinse thoroughly After descaling: Flush the system with fresh, clean water as directed in the manual. Rinse all removed parts thoroughly to remove any chemical residue. Rinsing is critical – you never want descaler left inside the machine or on parts that will contact ice. 5. Sanitise with Scotsman Ice Machine Sanitiser Cleaning removes dirt and scale. Sanitising reduces microorganisms and keeps ice safe. Using Scotsman Ice Machine Sanitiser: Mix the sanitiser according to the label instructions. Apply the solution to food-contact surfaces: Inside the bin Evaporator surfaces Curtains, baffles and removable parts Allow it to sit for the recommended contact time. Many food-safe sanitisers are designed as no-rinse products – check the label and follow the directions carefully. Some venues also pour a little sanitiser solution down the bin drain to keep it clean and smelling fresh. 6. Reassemble, restart and discard first batch of ice Refit all components once dry or as directed. Turn the water and power back on. Run the machine until it produces a full bin of ice. Discard this first load to ensure any final traces of cleaner or sanitiser are flushed out. Internal link Scotsman Ice Machine Cleaner & Sanitiser The Benefits of Scotsman Ice Machine Cleaner & Sanitiser Using the correct cleaning products makes a big difference to both hygiene and equipment life. 1. Designed for ice machines Scotsman-branded cleaners and sanitisers are formulated specifically for commercial ice machines, including Scotsman’s own evaporators and internal components. When used as directed, they’re: Effective on scale and slime Safe for sensitive surfaces Suitable for food-contact applications 2. Powerful scale removal Scotsman Ice Machine Cleaner: Breaks down hard water scale that sticks to the evaporator and water system Helps restore ice production capacity Supports more efficient operation and can help reduce energy usage 3. Better hygiene and ice quality Regular use of Scotsman sanitiser: Reduces slime, mould and bacteria in the bin and internal surfaces Helps keep ice clear, odourless and neutral-tasting Supports compliance with food safety and health inspection standards 4. Longer equipment life and fewer breakdowns A clean, descaled and sanitised ice machine: Experiences less stress on pumps, valves and sensors Suffers fewer blockages and faults Typically requires fewer emergency callouts and repairs Why a Water Filter Is Essential for Your Ice Machine Even with the best cleaning routine, poor water quality will constantly feed new scale and contaminants into your machine. That’s why a commercial water filter is so important. How a water filter helps A good filter system for ice machines will: Catch sediment such as sand, rust and dirt before it reaches the machine Reduce chlorine and organics that can affect the taste and smell of your ice Limit scale build-up by controlling minerals like calcium and magnesium (depending on filter type) Business benefits of installing a water filter With the right filter in place, you’ll notice: Cleaner, clearer and better-tasting ice Fewer scale-related problems in the machine Improved energy efficiency and performance Lower maintenance and repair costs over the life of the unit Internal link Water Filters for Commercial Ice Machines How Often Should You Clean and Replace Filters? Every venue is different, but as a practical guideline: Daily / As needed: Wipe external surfaces and clean up any spills in or around the bin. Every 3–6 months: Deep clean and sanitise the machine using Scotsman Ice Machine Cleaner & Sanitiser (more often in high-use or warm, humid environments). Every 6–12 months: Replace the water filter cartridge, or as recommended by the manufacturer and your local water conditions. Keeping a simple maintenance log (dates, products used, who did the work) is a big help when council or health inspectors visit, and it helps your team stay on top of routine cleaning. Why Buy from Hospitality Connect? At Hospitality Connect (7/20 Hickeys Road, Penrith, NSW), we specialise in commercial catering and hospitality equipment – including: Scotsman ice machines Scotsman Ice Machine Cleaner & Sanitiser Compatible water filtration systems Service advice and support for busy venues Whether you run a café, bar, club, restaurant or pub, our team can help you choose the right cleaner, sanitiser and water filter to suit your machine and your local water conditions. Visit us in-store at Hospitality Connect, 7/20 Hickeys Road, Penrith FAQ – Cleaning Commercial Ice Machines & Scotsman Cleaner 1. How often should I clean my commercial ice machine? Most venues should deep clean and sanitise their ice machine every 3–6 months, depending on: How much ice you use Local water quality Ambient temperature and humidity High-volume or high-humidity sites may need more frequent cleaning. Daily or weekly wipe-downs of the bin and external surfaces should also be part of your routine. 2. Why should I use Scotsman Ice Machine Cleaner & Sanitiser instead of general chemicals? Scotsman products are: Specifically designed for ice machine materials and components Food-safe when used according to directions Proven to be effective on scale, slime and organic build-up Using general descalers or harsh chemicals can damage internal parts, void warranties or leave unsafe residues. Scotsman cleaner and sanitiser are formulated for this exact job. 3. What happens if I don’t clean and sanitise my ice machine regularly? If cleaning is neglected, you may see: Slime, mould and scale inside the bin and water system Off-tasting, cloudy or soft ice Reduced ice production Increased breakdowns and repair costs Potential food safety issues and negative health inspection results In worst cases, you could face fines, warnings or reputational damage if contaminated ice makes customers unwell. 4. Why do I need a water filter on my ice machine? A water filter: Protects your machine from sediment and particles Reduces chlorine and organic compounds that affect taste Helps slow down scale build-up That means better quality ice, fewer internal problems and a longer life for your equipment. 5. How often should I change the water filter? As a general rule, most commercial ice machine water filters should be replaced every 6–12 months, or according to the manufacturer’s guidelines. Very hard water or high-usage sites may need more frequent changes. If you see a drop in ice quality or production, or your machine is showing scale again sooner than expected, it may be time to change the filter. 6. Can Hospitality Connect help me choose the right cleaner and filter? Yes. The team at Hospitality Connect can: Recommend the correct Scotsman cleaner and sanitiser for your machine Help you select the right water filtration system based on your model and water quality Advise on maintenance schedules to suit your venue

How to Clean a Kitchen Canopy (and When to Upgrade Your Filters)
Knowing how to clean a kitchen canopy is essential to keeping your commercial kitchen safe, efficient, and compliant. Over time, grease and grime build up inside the canopy and ductwork, slowing airflow and significantly increasing fire risk. For many restaurant, bar and café operators, a neglected canopy quickly turns into costly downtime and safety issues. Regular, correct cleaning is the solution—combined with quality filters and, where needed, a custom-made canopy or filtration solution. At Hospitality Connect, we work with commercial kitchens across Australia to design, supply and support complete exhaust and ventilation systems. We can supply new canopy filters, arrange custom-made canopy solutions, and connect you with trusted professional cleaners to keep your system in top shape. 👉 Learn more about our commercial kitchen canopy and exhaust solutions In this guide, we’ll walk you through the key steps for cleaning your kitchen canopy and filters, and show where Hospitality Connect can help you upgrade, replace or customise components for better performance and compliance. Grease Buildup Slowing Your Kitchen? Here’s How to Fix It Get the Right Gear:Warm or hot water, a commercial kitchen degreaser, scrub brushes, non-abrasive pads, cloths, gloves, buckets, and ideally a steam cleaner or pressure washer. Have replacement hood filters ready if yours are damaged or worn. 👉 Browse our commercial hood and canopy filters for replacement or custom-sized options. Clean All Major Components:Clean the exhaust system, canopy/hood, filters and condensate hoods to remove grease, dirt and airborne dust. Frequent cleaning keeps airflow consistent and reduces fire risk. Inspect & Maintain:After cleaning, inspect for damage, leaks and poor airflow. Schedule professional cleaning where needed and replace filters that are no longer effective. Step 1: Collect the Tools You’ll Need Having everything ready makes kitchen canopy cleaning safer, easier and more effective. You’ll need: Warm or hot water Commercial degreasing detergent (food-safe, stainless-safe) Scrub brushes and non-abrasive pads Microfibre cloths, buckets and protective gloves Steam cleaner or pressure washer (if available) Replacement hood filters (if existing filters are damaged, worn or warped) Once you have these, you’re ready to start with the exhaust system. Step 2: Clean the Kitchen Exhaust System Your kitchen exhaust system includes the ducts, exhaust fan and fan housing. If these areas are not cleaned regularly, grease buildup becomes a serious fire hazard and can reduce extraction performance. Steps: Turn off and isolate power to the exhaust fan. Access the ducts and spray with hot water and degreaser. Scrub internal duct surfaces carefully to remove built-up grease. Clean the fan housing and blades, removing all visible grease and dirt. Rinse thoroughly and allow all components to dry before reconnecting. For guidance on ventilation and duct design, see our commercial kitchen exhaust and ducting solutions. For additional safety information on ventilation and fire risk, you can also refer to: Safe Work Australia – Managing risks of plant in the workplace Your local fire authority, such as Fire and Rescue NSW Step 3: Clean the Exhaust Hood / Canopy The canopy (range hood) sits above your cooking line and is the first point of contact for grease, smoke and steam. Steps: Spray a commercial degreaser on both the interior and exterior of the canopy. Allow it to sit briefly (following the manufacturer’s instructions). Scrub with brushes and non-abrasive pads to remove heavy grease. Wipe down with warm water until all residue is gone. Dry thoroughly to prevent mould and corrosion on stainless steel. If your canopy is poorly designed, undersized or hard to access for cleaning, Hospitality Connect can help with custom-made canopy solutions that improve capture, airflow and serviceability. Step 4: How to Clean Kitchen Canopy Filters Canopy filters (hood filters or baffle filters) trap grease before it enters the ductwork. Blocked or damaged filters restrict airflow and increase fire risk. Steps: Turn off the exhaust system and ensure the area is cool. Carefully remove the filters from the canopy. Fill a sink or tub with hot water and degreasing detergent. Soak filters for 15–20 minutes to break down built-up grease. Scrub each filter with a soft brush or non-abrasive sponge. Rinse thoroughly with warm water and allow to air-dry completely. Wipe off any remaining moisture with a clean towel. Inspect for damage, warping or corrosion. Replace if needed. Reinstall by sliding or lifting the filters back into the canopy, ensuring they sit flat and secure. Clean filters maintain consistent airflow, reduce fire risk and prolong the life of your canopy and fan. . Step 5: Clean Condensate Hoods Condensate hoods are designed to capture moisture, especially in high-volume or steam-heavy operations. If not maintained, they can cause mould growth and damage equipment. Steps: Switch off and isolate the ventilation system. Remove the condensate drain tray or hose and carefully empty any liquid (it may be hot and contain food particles). Wipe the tray and piping with a clean sponge or cloth. Clean tray and drain lines with a kitchen-safe, non-allergenic degreaser. Rinse with warm water and ensure no chemical residue remains. Dry thoroughly with towels and allow components to air dry. Reinstall the drain tray or hose, restart the system and check for leaks or unusual noises. Clean condensate hoods help maintain better air quality and reduce moisture-related damage throughout your kitchen. Step 6: Improve and Maintain Air Quality Once your canopy and components are clean, focus on keeping air quality safe and efficient. This helps prevent airborne grease, smoke and odours from building back up quickly. Do this by: Setting a regular cleaning schedule based on your cooking volume. Routinely inspecting ducts, fans and filters for grease or damage. Replacing filters when they’re no longer effectively trapping grease. Booking professional deep cleans at intervals required for your operation and insurance. 👉 For help with airflow issues or redesign, visit our kitchen design and ventilation services or talk to our team. For general guidance on workplace air quality, you can also review Safe Work Australia – Airborne contaminants information. Step 7: Run a Detailed Post-Clean Inspection A thorough inspection after each clean ensures your canopy system is safe and operating as intended. Check for: Any remaining tough grease on canopy, filters or ducts Loose parts, damaged seals or leaks in ductwork Exhaust fan performance (noise, vibration, airflow) Compliance with workplace safety, health and insurance requirements Regular inspection and documentation help keep your commercial kitchen canopy aligned with fire safety expectations and insurance conditions. For a more technical overview, you can refer to ventilation and fire safety standards such as those published by Standards Australia. Professional vs DIY Canopy Cleaning There’s a clear line between daily/weekly surface cleaning and full commercial kitchen canopy cleaning. DIY / In-house: Wiping external canopy surfaces Cleaning and soaking filters Light cleaning of accessible areas Professional cleaning: Deep cleaning inside ducts and fan housings Heavy grease removal with specialist equipment Detailed reporting for compliance and insurance Professional cleaners use specialised tools such as high-temperature steam, pressure washers and food-safe chemicals to reach deep into the system and remove combustible grease. 👉 Hospitality Connect can work alongside your chosen cleaners or recommend trusted partners, and we can supply or upgrade canopies and filters so your system cleans more effectively and lasts longer. Learn more about our commercial kitchen equipment and solutions. How Often Should You Clean a Kitchen Canopy? Cleaning frequency depends on how much and what type of cooking you do: Low-volume cooking (day camps, seasonal venues):Clean canopy and ducts at least every 6 months. Moderate-volume cooking (typical restaurants, cafés):Clean canopy, ducts and filters every 3 months. High-volume or solid-fuel cooking (charcoal, wood, heavy frying):Clean monthly or as required by safety regulations and insurance. Skipping recommended cleaning cycles can lead to fines, increased energy costs, equipment damage and higher fire risk. . Final Thoughts A clean kitchen canopy isn’t just about appearance—it’s about safety, airflow, compliance and profitability. By: Using the right cleaning tools and methods Maintaining your exhaust system, canopy, filters and condensate hoods Monitoring air quality and scheduling professional deep cleans …you protect your staff, your equipment and your business. 👉 Where Hospitality Connect Fits In Supply and replace commercial hood filters – see our canopy filter range Provide custom-made canopy and filtration solutions – learn about custom canopy design and stainless steel fabrication Assist with system design, upgrades and airflow performance – explore our kitchen design & ventilation services Support compliance with health, fire and insurance requirements – stay informed via Safe Work Australia and your local fire authority If your current canopy is hard to clean, constantly greasy or not extracting well, Hospitality Connect can help you review, redesign or replace key components so your kitchen runs safer and smoother. Frequently Asked Questions How do you clean a dirty canopy? A dirty canopy usually means heavy grease and smoke buildup. Turn off and isolate the exhaust system. Apply a commercial kitchen degreaser to internal and external surfaces. Scrub with non-abrasive pads and hot water to loosen grease. Rinse and dry thoroughly. If grease has penetrated into ducts or fan housings, it’s best to engage professional canopy cleaners to ensure the system is cleaned to compliance standards. 👉 For replacement filters or a better-designed canopy, see our canopy and exhaust solutions. How do you clean a stove canopy? Switch the system off and let surfaces cool. Spray the canopy with a food-safe degreaser. Wipe with non-abrasive pads to avoid scratching stainless steel. Rinse with warm water to remove all chemical residue. Dry completely to prevent mould and corrosion. This should form part of your regular daily or weekly cleaning routine to prevent expensive breakdowns and performance issues. How do you clean kitchen canopy filters? Filters block grease before it reaches ducts and fans, so keeping them clean is vital. Turn off the exhaust system and remove filters. Soak in hot water with degreasing detergent. Scrub with a soft brush or non-abrasive sponge. Rinse thoroughly and allow to air-dry. Replace any filters that are damaged or heavily clogged. Reinstall securely. Clean filters maintain consistent airflow, reduce fire risk and prolong the life of your canopy and system.

Top 5 Cocktails for 2026: Style, Flavour & Presentation by Hospitality Connect
The world of mixology is always evolving, and 2026 is all about bold flavours, refined presentation, and smart bar innovation. Whether you manage a bar, restaurant, or café, these trending cocktails bring creativity and profit to your beverage menu. At Hospitality Connect, we supply everything you need to craft this year’s must-have drinks, from professional bar tools to premium glassware by Bormioli and RCR, built for style, durability, and service efficiency. Quick overview for searchers: here are five trending cocktails for 2026 that combine flavour innovation, premium glassware, and sustainable techniques. (Internal link: Explore our Barware Collection) Top 5 Trending Cocktails for 2026 1. The Savoury Martini – A Modern Classic A contemporary twist on a timeless favourite, the Savoury Martini blends the elegance of gin or vodka with subtle herbal and briny notes. Recipe: 60 ml gin or vodka 10 ml dry vermouth 5 ml olive brine Fresh herbs (rosemary or thyme) Method: Add ingredients to a mixing glass with ice. Stir until well chilled. Strain into a chilled martini glass. Garnish with a rosemary sprig or olive skewer. Recommended Glass: Serve in an RCR Crystal Martini Glass for a sleek, polished look. Bar Tools Needed: Mixing glass Jigger Bar spoon Strainer (External link: Learn the history of the Martini – Difford’s Guide) Shop the look: Martini glasses, stirring tools, complete barware kits. 2. Manzanilla Sherry Spritz – Light & Elegant Sherry-based cocktails are making a refined comeback. The Manzanilla Sherry Spritz offers delicate salinity, balance, and complexity, perfect for pre-dinner service. Recipe: 45 ml Manzanilla sherry 15 ml gin 10 ml lemon juice 10 ml simple syrup Top with soda water Method: Shake all ingredients (except soda) with ice. Strain into a wine glass filled with ice. Top with soda water and stir gently. Garnish with a lemon twist. Recommended Glass: Serve in a Bormioli Inalto Wine Glass for clarity and sophistication. Bar Tools Needed: Shaker tin Jigger Strainer Citrus press (External link: Manzanilla Sherry background – Sherry Notes) Shop the look: Wine glasses, spritz tools, bar kits. 3. Tropical Revival – The New Tiki Tiki culture is back with fresh fruit, vibrant colours, and layered tropical flavours. The Tropical Revival cocktail brings holiday vibes to any venue. Recipe: 50 ml dark rum 25 ml pineapple juice 15 ml lime juice 10 ml passionfruit or coconut syrup Dash of Angostura bitters Method: Shake all ingredients with ice. Strain into a highball glass with crushed ice. Garnish with pineapple and mint. Recommended Glass: Use an RCR Highball Glass that is durable and perfect for high-volume cocktail service. Bar Tools Needed: Shaker tin Jigger Strainer Bar spoon Shop the look: Highball glasses, tiki tools, starter kits. 4. The Pickled Cooler – Savoury & Refreshing This inventive cocktail balances crispness with umami depth by using pickle brine for a hint of savoury intrigue. Recipe: 45 ml vodka or tequila 15 ml pickle brine 10 ml lime juice 10 ml simple syrup 2 cucumber slices Mint sprig Method: Muddle cucumber in a shaker. Add other ingredients and ice. Shake and strain into a rocks glass over ice. Garnish with mint or a pickled ribbon. Recommended Glass: Serve in a Bormioli Rocks Glass for clean lines and durability. Bar Tools Needed: Shaker tin Muddler Jigger Strainer Shop the look: Rocks glasses, muddlers, barware kits. 5. Zero-Waste Garden Cocktail – Sustainable & Stylish Sustainability remains a leading trend in 2026. This eco-friendly cocktail uses every part of your ingredients to create a zero-waste masterpiece. Recipe: 45 ml gin or vodka 15 ml homemade citrus peel syrup 20 ml lime juice Top with soda or tonic Garnish with herbs and dried fruit Method: Shake all ingredients (except soda) with ice. Strain into a tall glass over ice. Top with soda or tonic and garnish. Recommended Glass: Serve in an RCR Collins Glass, a sustainable design that pairs perfectly with this eco-inspired serve. Bar Tools Needed: Shaker tin Fine strainer Jigger Citrus zester Shop the look: Collins glasses, eco-friendly tools, barware kits. Glassware That Defines the Experience Every great cocktail starts with the right glass. At Hospitality Connect, we stock the finest Bormioli and RCR Crystal Glassware, designed for both performance and elegance. Bormioli Glassware: Italian-made, durable, and perfect for everyday commercial use. RCR Crystal Glassware: Premium clarity and brilliance, ideal for high-end presentation. Bar Tools You’ll Need Elevate your bar setup with our professional-grade bar tools and accessories, including: Cocktail shakers Jiggers and strainers Muddlers and bar spoons Citrus tools and pourers Stay Ahead With Hospitality Connect From bold savoury martinis to sustainable zero-waste serves, 2026 is shaping up to be a year of creativity behind the bar. Keep your menu fresh with premium glassware and professional bar tools. For complete setups, explore our Barware Kits. Frequently Asked Questions (FAQ) Q1: What are the top cocktail trends for 2026?The major trends include savoury martinis, low-ABV spritzes, tiki revivals, umami-forward drinks, and sustainable cocktails focused on zero waste. Q2: Why use professional glassware like Bormioli or RCR?Both brands offer superior durability, balance, and clarity, ensuring cocktails look and feel premium while withstanding commercial use. Q3: What tools should every bartender have?Essential tools include a shaker, jigger, strainer, bar spoon, and muddler, all available through Hospitality Connect. Q4: How can I make my bar more sustainable?Focus on waste reduction, reusable materials, and efficient equipment. Start by reusing citrus peels for syrups, batching to reduce waste, and choosing durable glassware.

National Microwave Day: Powering Efficiency in Every Commercial Kitchen
Every year on National Microwave Day, we celebrate one of the most valuable pieces of equipment in both homes and commercial kitchens — the microwave oven. But in hospitality, not all microwaves are created equal. At Hospitality Connect, we’re proud to supply trusted brands like Bonn, Menumaster, and Benchstar, helping businesses across Australia achieve speed, consistency, and reliability in every service. Why Commercial Microwaves Are Essential in Modern Kitchens While domestic microwaves are designed for occasional home use, commercial microwaves are built to perform all day, every day. They handle high volumes, operate faster, and deliver uniform results — all while standing up to the pressures of a professional kitchen. Key Benefits High Power and Speed: Cook and reheat food in seconds, not minutes. Durability: Heavy-duty construction withstands continuous operation. Consistency: Advanced magnetrons distribute heat evenly, reducing cold spots. Ease of Use: Simple, programmable controls ensure accuracy during busy service hours. (Internal link: Explore our range of Commercial Microwaves) Cooking Performance: Commercial vs Domestic Microwaves The biggest difference between a commercial and domestic microwave lies in how they cook food. 1. Power Output and Speed Commercial microwaves operate at higher wattage (typically 1000–3000 watts) compared to domestic models (around 700–1000 watts). This means food heats faster and more evenly, reducing waiting time during busy service. 2. Even Heat Distribution Domestic microwaves use a rotating glass turntable to move the food for even cooking. In contrast, commercial microwaves use stirrer fans or rotating antennas to distribute microwave energy throughout the cavity — eliminating the need for a turntable. This ensures consistent cooking results, even for large portions or multiple dishes at once. 3. Cooking Capacity Commercial microwaves feature larger, more robust cavities that can accommodate full-sized plates, gastronorm trays, or bulk portions — ideal for commercial operations. Domestic microwaves are smaller and not suited to continuous high-volume cooking. 4. Menu Flexibility Many commercial models from Bonn, Menumaster, and Benchstar include programmable menus, allowing chefs to set precise cooking times and power levels for menu items — improving accuracy and reducing human error. 5. Heat Consistency and Food Quality Commercial microwaves are designed to reheat or cook food without drying it out, maintaining the quality of dishes such as sauces, soups, meats, and pastries. Domestic models can struggle with uneven results and overheating. Feature Commercial Microwave Domestic Microwave Power Output 1000–3000W 700–1000W Usage Continuous daily operation Light household use Heating System Stirrer or dual magnetron Turntable-based Cooking Speed Up to 3× faster Slower, less consistent Durability Reinforced, stainless steel build Lightweight components Programming Pre-set menus and time options Manual settings only Spotlight on Leading Brands Bonn Commercial Microwaves Proudly Australian-engineered, Bonn microwaves combine reliability, precision, and performance. Designed for constant use, they’re ideal for high-volume kitchens where timing and quality matter most. Menumaster Commercial Microwaves Known worldwide for their strength and speed, Menumaster models feature powerful magnetrons and multiple power levels — perfect for fast-paced restaurants and cafés where seconds count. Benchstar Commercial Microwaves Benchstar offers dependable and affordable performance. With simple controls, robust construction, and fast cooking cycles, these microwaves are ideal for catering, canteens, and high-turnover operations. The Bottom Line: Built for Business Domestic microwaves are perfect for home kitchens — but commercial kitchens need commercial equipment. A Bonn, Menumaster, or Benchstar microwave delivers the strength, precision, and reliability that today’s food service industry demands. Frequently Asked Questions (FAQ) Q1: What’s the difference between commercial and domestic microwaves in terms of cooking?Commercial microwaves cook faster and more evenly using higher power and advanced heat distribution systems. Domestic models rely on lower wattage and turntables, leading to uneven results in large portions. Q2: Are commercial microwaves more energy efficient?Yes. They heat food faster and more evenly, reducing overall cooking times and energy use. Q3: Can I use metal containers in a commercial microwave?Certain models, like those from Bonn and Menumaster, allow for the safe use of specific metal pans. Always check the manufacturer’s manual before use. Q4: What’s the best commercial microwave for my business?It depends on your kitchen size, service volume, and menu type. Our team at Hospitality Connect can help you choose the right model to suit your needs.
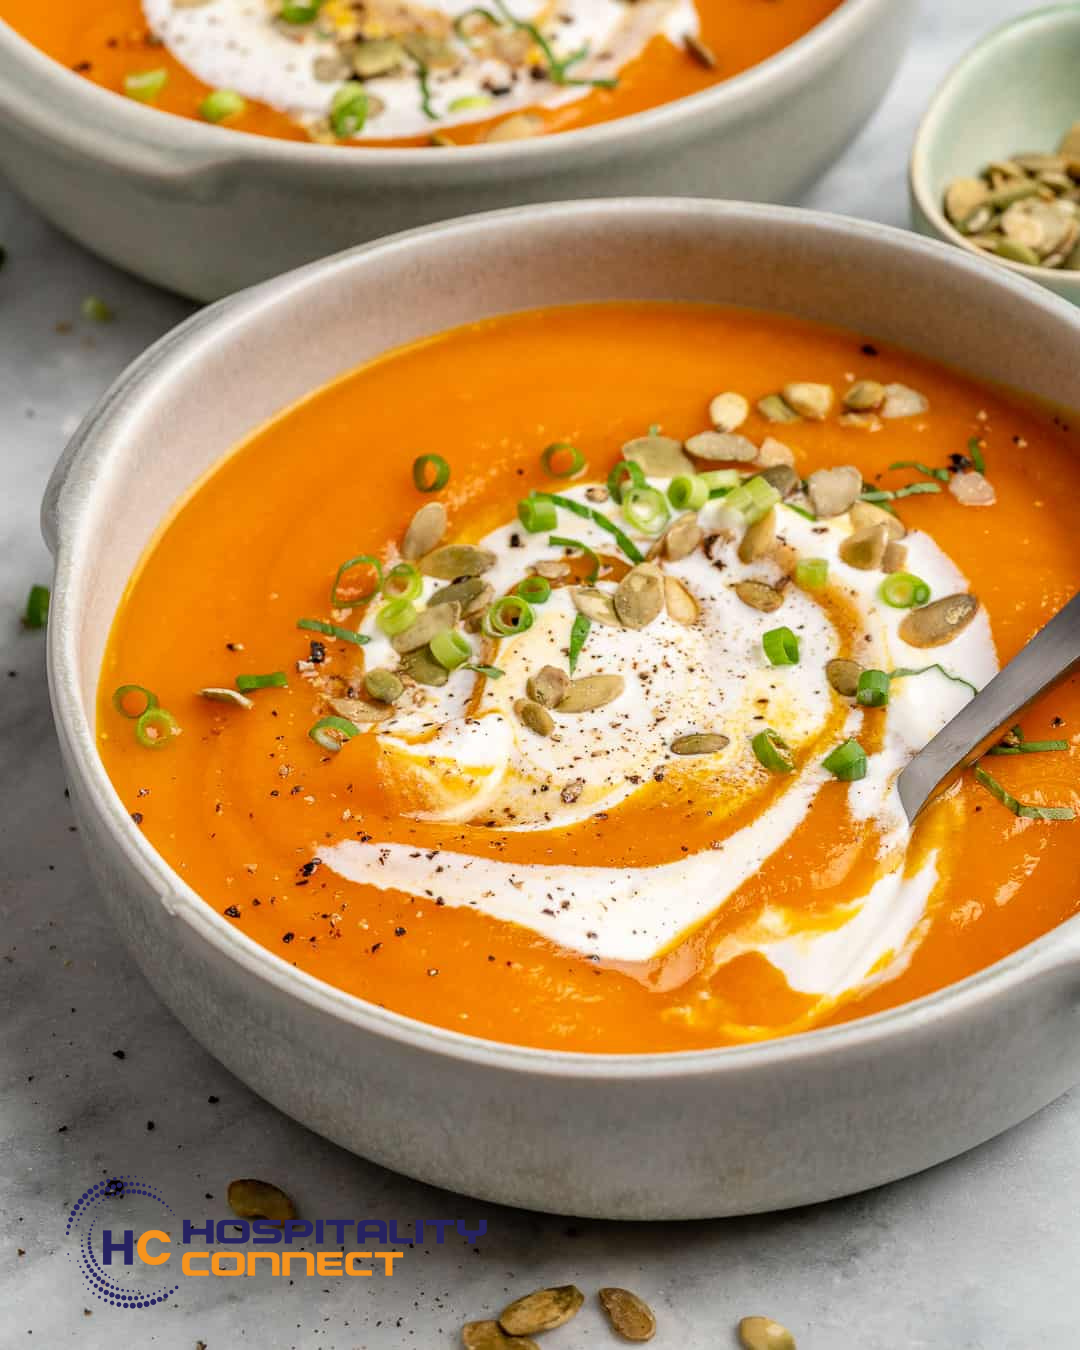
🥣 The Ultimate Pumpkin Soup Recipe for Commercial Kitchens | Hospitality Connect
When the weather cools down, nothing beats a creamy, comforting pumpkin soup. Whether you’re serving it in a café, restaurant, or hotel, this timeless favorite can be elevated with the right kitchen tools and sustainable serving solutions. At Hospitality Connect we supply premium commercial kitchen equipment designed to make every dish faster, fresher, and more efficient. 🥣 Creamy Pumpkin Soup Recipe for Commercial Kitchens | Hospitality Connect When the cooler months roll in, a bowl of creamy pumpkin soup becomes an irresistible comfort food — rich, wholesome, and perfect for cafés, restaurants, and catering menus.At Hospitality Connect, we believe that great food starts with the right equipment. Using top-quality tools like the Dynamic Stick Blender, CookTek Induction Cooktop, and BioPak Containers, you can prepare, cook, and serve this customer favorite efficiently and sustainably. 👨🍳 Pumpkin Soup Recipe (Commercial Kitchen Style) 🥕 Ingredients 3 kg Kent or Butternut pumpkin (peeled, deseeded, chopped) 4 medium onions, diced 3 cloves garlic, crushed 2 L vegetable or chicken stock 250 mL thickened cream (or coconut cream for a vegan option) 2 tbsp olive oil or butter Salt and pepper to taste Optional: nutmeg, roasted pumpkin seeds, or chili oil for garnish 🔥 Method 1. Prep and Sauté On your CookTek Induction Cooktop, heat the olive oil or butter in a large stockpot.Add diced onion and garlic, and sauté gently until fragrant and translucent.The induction surface provides precise temperature control, ensuring your aromatics don’t burn. 2. Cook the Pumpkin Add the chopped pumpkin and stock to the pot. Bring to a simmer and cook for 20–25 minutes, or until the pumpkin is tender.The CookTek Induction Cooktop’s consistent heat distribution means your soup cooks evenly every time — saving energy and time in a busy kitchen. 3. Blend Until Smooth Turn off the heat and allow the soup to cool slightly. Then, using your Dynamic Stick Blender blend the soup until smooth and creamy.This commercial-grade blender can handle large batches effortlessly, producing a silky texture ideal for fine dining or takeaway. 4. Finish and Season Return the soup to low heat, stir in cream (or coconut cream), and season with salt, pepper, and a touch of nutmeg.Simmer gently for 5 minutes until heated through. 5. Serve and Store For dine-in service, serve with crusty bread and a drizzle of cream.For takeaway or delivery, use BioPak Containers — sustainable, compostable, and designed to handle hot soups safely. Your customers will love the eco-friendly presentation. 🧑🍳 Why Pumpkin Soup is a Menu Essential Pumpkin soup is a versatile, crowd-pleasing dish — perfect as an entrée, side, or even a hearty takeaway meal. Its natural sweetness pairs beautifully with savory herbs, cream, or coconut milk, making it suitable for a wide range of menus. In commercial kitchens, speed and consistency are key — and that’s where your equipment matters most. ⚡ Power Through Prep with the Dynamic Stick Blender When it comes to blending smooth, velvety pumpkin soup, the Dynamic Stick Blender is your secret weapon.Designed for heavy-duty performance, it can handle large batches effortlessly, giving you that restaurant-quality texture every time. Key Features: Powerful motor for fast blending Stainless steel shaft for durability Easy to clean and maintain Ideal for soups, sauces, and purées This blender is a staple in commercial kitchens that demand performance and reliability. 🔥 Precision Cooking with the CookTek Induction Cooktop For chefs seeking precision and energy efficiency, the CookTek Induction Cooktop is a game changer. Unlike gas burners, induction cooktops heat food faster and maintain consistent temperatures — perfect for simmering soups without scorching. Benefits of CookTek Induction: Rapid, even heating Energy-efficient and safe to use Easy to clean glass surface Ideal for high-volume cooking environments With CookTek, you can maintain perfect control over your pumpkin soup’s consistency, ensuring every bowl is served hot and delicious. 🌿 Serve Sustainably with BioPak Containers If your business offers takeaway or catering, eco-friendly packaging is a must. BioPak Containers are made from renewable, compostable materials — helping you reduce your environmental footprint while presenting your food beautifully. Pair your pumpkin soup with a BioPak paper cup or container, and you’ll be serving warmth in every sense of the word — delicious, sustainable, and stylish. 💡 Pro Tip: Enhance Your Soup Presentation Add a swirl of cream, sprinkle of roasted pumpkin seeds, or drizzle of chili oil before serving. Presentation turns a simple soup into a gourmet experience that keeps customers coming back. ❓ Frequently Asked Questions (FAQ) Q1: Can I make pumpkin soup in bulk for commercial service?Absolutely! Using the Dynamic Stick Blender allows you to blend large volumes of soup quickly and evenly. Q2: Why use induction instead of gas for soup?The CookTek Induction Cooktop provides faster heat-up times, precise control, and energy savings — essential in professional kitchens. Q3: Are BioPak containers suitable for hot soups?Yes, BioPak Containers are designed to handle hot liquids safely and sustainably, making them ideal for takeaways. Q4: Where can I purchase these products?You can explore all these items and more at Hospitality Connect — your trusted source for commercial kitchen solutions. 🧡 Final Thoughts Pumpkin soup isn’t just a winter classic — it’s a showcase of skill, efficiency, and care. With top-tier tools like the Dynamic Stick Blender, CookTek Induction Cooktop, and BioPak Containers, your kitchen can deliver exceptional results every time. Visit Hospitality Connect today to elevate your cooking and sustainability standards.

The Ultimate Cups to Grams Conversion Guide for Australian Chefs (2026 Edition)
In professional kitchens, precision means consistency - and consistency means happy customers. Whether you are baking pastries, prepping sauces, or scaling up recipes, knowing how to accurately convert cups to grams can make or break a dish. This comprehensive guide by Hospitality Connect will help you understand ingredient densities, provide conversion tables for common ingredients, and highlight the best tools for accurate measuring. Why Accurate Measurements Matter Every chef knows that a tablespoon too much or too little can ruin a recipe. Measuring by weight (grams) is far more accurate than using cups or spoons - especially in commercial kitchens where consistency and cost control are vital. For example, 1 cup of flour may weigh anywhere from 110 g to 130 g depending on humidity and how tightly it is packed. Using a measuring jug or digital scale ensures precision every time. Professional-grade measuring jugs and glasses improve speed and accuracy on any prep bench. Quick Reference: Australian Cup Conversions Before diving into specific ingredients, here is the Australian standard conversion reference (note that US and UK cup sizes differ slightly): Cup Measurement Millilitres (ml) Grams (Water) Grams (All-Purpose Flour) Grams (Sugar) ¼ cup 60 ml 60 g 30 g 50 g ⅓ cup 80 ml 80 g 40 g 67 g ½ cup 125 ml 125 g 60 g 100 g 1 cup 250 ml 250 g 120 g 200 g 2 cups 500 ml 500 g 240 g 400 g Quick reference for Australian metric cup conversions — based on standard densities of water, flour, and sugar. Flour Conversion Chart Flour varies in weight depending on type and aeration. For accuracy, spoon flour into your cup and level it off rather than scooping directly from the bag. Cup Measurement Millilitres (ml) Grams (All-Purpose Flour) ¼ cup 62.5 ml 30 g ⅓ cup 83 ml 40 g ½ cup 125 ml 60 g 1 cup 250 ml 120 g 2 cups 500 ml 240 g Tip: Use a mini multi measuring glass for small ingredient conversions like baking powder or spices. Level flour at eye height for accurate readings - avoid compacting unless a recipe specifies packed flour. Sugar Conversion Chart Different sugars have different densities - brown sugar packs more tightly than white, and icing sugar weighs less due to air content. Cup Measurement Granulated Sugar (g) Brown Sugar (g) Icing Sugar (g) ¼ cup 50 g 55 g 40 g ⅓ cup 67 g 75 g 55 g ½ cup 100 g 110 g 80 g 1 cup 200 g 220 g 160 g Granulated, brown, and icing sugar measured in glass bowls with stainless steel measuring cups on a white kitchen bench for sugar conversion accuracy. Butter Conversion Chart Butter conversions are more consistent because butter has a set density. Always measure butter at room temperature for the best accuracy. Cup Measurement Grams (Butter) ¼ cup 57 g ⅓ cup 76 g ½ cup 113 g 1 cup 227 g 2 cups 454 g For melting or portioning, a 600 ml Avanti measuring jug is perfect for precise liquid butter or oil measurements. Soft golden butter cubes measured on a digital kitchen scale beside a stainless steel measuring jug and spoon – accurate butter conversion setup for professional kitchens. Additional Ingredient Conversions Here are more common kitchen ingredients for chefs and bakers who rely on accuracy: Ingredient 1 Cup (Approx. g) Notes Rice (uncooked) 195 g Rinse before weighing Oats (rolled) 90 g Lightly packed Honey 340 g Thick consistency - weigh directly Milk 250 g 1:1 ml = g Oil (vegetable) 225 g Use liquid measuring jug Cocoa Powder 100 g Sift before measuring Measured bowls of rice, oats, honey, milk, oil, and cocoa powder arranged on a kitchen bench with stainless steel measuring cups for ingredient conversion reference. Tools for Precision in Every Kitchen Having the right tools ensures accuracy and efficiency. At Hospitality Connect, we stock a full range of professional-grade measuring cups, jugs, and spoons that meet Australian standards. For larger volume prep, try the Cambro 4 Litre Measuring Jug - durable, stackable, and dishwasher safe. Bar Utensils - for accurate pours and cocktail prep. Bar Accessories - for professional service and portion control. Utensils & Gadgets - from whisks to scrapers, every gram counts. Thermometers & Timers - because precision does not stop at weight. Choose Australian-standard utensils and label jugs by liquid type to prevent cross-contamination. Expert Tips for Accurate Conversions Weigh, do not scoop: Scooping flour compresses it. Always spoon and level, or better yet, weigh it. Calibrate your scale: Check with a 100 g test weight weekly. Use standard tools: Stick to Australian-standard utensils to avoid mismatched recipes. Label your tools: Especially when using multiple jugs for different liquids to prevent cross-contamination. Keep a conversion chart handy: Laminate and place it near prep stations for quick reference. FAQs: Cups to Grams Conversion How many grams are in 1 cup? That depends on the ingredient. For example, 1 cup of water = 250 g, 1 cup of flour = 120 g, and 1 cup of sugar = 200 g. Always refer to ingredient-specific charts. Is 1 cup equal to 100 grams? No. Cup measures volume, while gram measures weight. The conversion varies by ingredient density. What is the Australian standard cup size? 1 Australian metric cup = 250 ml. It differs from the US cup (240 ml) and UK cup (284 ml), so always confirm which standard your recipe uses. What is the best way to convert cups to grams? Use a reliable conversion chart or a digital scale that switches between metric and imperial units. We recommend the Avanti Measuring Glass for quick small-volume conversions. Where can I find professional measuring tools? Explore Hospitality Connect's measuring range - all Australian-standard certified. Conclusion: Accuracy Builds Reputation From bakeries and cafés to large commercial kitchens, mastering conversions builds trust and consistency. By following this guide and equipping your kitchen with professional tools, you will ensure every dish meets the highest standards of taste and presentation. For more chef-approved utensils and precision tools, visit Hospitality Connect - your trusted source for quality hospitality equipment across Australia. External References: Food Standards Australia New Zealand | The Culinary Institute of Australia
Types of Bars in Australia: 14 Bar Concepts for Hospitality Owners | Hospitality Connect
Opening a bar is one of the most exciting ventures in the hospitality industry — but it’s also one of the most competitive. Choosing the right type of bar sets the tone for your brand, shapes your menu and pricing strategy, and determines the kind of customers you’ll attract. At Hospitality Connect, we work with venue owners across Australia to create successful bar concepts that combine smart design, reliable bar equipment, and strong customer appeal. Whether you’re launching a sleek cocktail lounge, a vibrant sports bar, or a relaxed neighbourhood pub, understanding the different types of bars is the first step to building a thriving business. Explore our complete guide below to discover which bar style best matches your vision — and how to bring it to life. Types of Bars in Australia 1. Cocktail Bar Craftsmanship, creativity, and presentation define the modern cocktail bar. These venues celebrate mixology with classic recipes and signature creations served in premium glassware. The best cocktail bars invest in quality bar tools and refrigeration to maintain consistency and deliver memorable experiences. Pair cocktails with small plates or tapas to elevate the menu, and ensure your setting reflects sophistication — from lighting to seating. For deeper insights into bar trends and mixology techniques, explore Australian Bartender Magazine. 2. Sports Bar Sports bars are energetic, social spaces designed for fans to enjoy the game together. These venues feature multiple large screens, casual food menus, and a wide beer selection. From classic pub meals to local craft brews, the focus is on keeping guests entertained and comfortable for hours. Invest in commercial beer fridges and display coolers to keep beverages cold during busy game nights. Regular events such as trivia, themed nights, or happy hours help create repeat customers and a loyal local following. 3. Dive Bar The dive bar thrives on authenticity and simplicity. With no-frills décor and affordable drinks, these venues attract regulars who appreciate genuine service and an easy-going environment. Think basic beers, classic spirits, and friendly staff — no gimmicks needed. Affordable pricing and a comfortable layout are key. Durable bar furniture and stools can handle heavy use while maintaining the laid-back charm that keeps customers returning. 4. Pub or Tavern Rooted in tradition, pubs and taverns create a warm, welcoming environment ideal for community gatherings. The menu usually features hearty comfort food like burgers, steaks, and stews, paired with beers, ciders, and classic cocktails. High-performance commercial kitchen equipment ensures efficiency during peak dining hours. Many pubs also host quiz nights, live music, and family-friendly events — making them timeless social hubs for all ages. 5. Brewpubs & Beer Gardens Australia’s craft beer scene has inspired a wave of brewpubs and beer gardens. These venues celebrate locally brewed and specialty beers served in casual, communal spaces. Outdoor areas and food truck partnerships enhance the experience, while rotating taps and beer flights keep the offering fresh. For outdoor service areas, invest in reliable outdoor refrigeration and bar setups to handle the Australian climate. Encourage social sharing with tasting paddles and seasonal beer menus. 6. Rooftop Bar Rooftop bars combine panoramic views with modern design, creating high-value spaces for socialising and private events. Stylish lounge furniture, ambient lighting, and seasonal cocktails define the experience. To maximise year-round trade, consider installing heaters or retractable roofs for comfort in all seasons. 7. Wine Bar Wine bars offer an elegant yet approachable environment, ideal for sharing small plates and conversation. A curated list of wines available by the glass or bottle sets the tone. Complement the drinks with cheese boards, tapas, or charcuterie and aim for décor that feels refined without pretence. 8. Live Music Bar Combining hospitality and entertainment, live music bars are all about ambience and sound. These venues host everything from acoustic sessions to DJ sets. Match the drink menu to the vibe — high-volume options for lively nights, and elegant cocktails for smaller shows. 9. Nightclub Nightclubs deliver high-energy experiences with DJs, dancing, and dynamic lighting. Efficient service is crucial: keep your menu streamlined, and train staff for fast-paced nights. Signature cocktails, bottle service, and themed events help elevate your brand and draw consistent crowds. 10. Hotel Bar A hotel bar offers a refined yet relaxed space for guests and locals alike. Often located in lobbies, pool areas, or rooftop spaces, they balance comfort with sophistication. Signature drinks that reflect your hotel’s brand personality can make the venue a destination on its own. 11. Specialty or Themed Bar Themed bars thrive on originality and atmosphere. From whisky lounges to tiki bars or 1920s speakeasies, these concepts attract niche audiences seeking immersive experiences. Consistent branding across décor, uniforms, and even drink names strengthens your story and customer loyalty. 12. Mobile Bar Mobile bars are a growing trend in Australia’s event scene. They bring the full bar experience to weddings, festivals, and private parties, often using converted vans or trailers. With the right design, signage, and branding, a mobile bar can become a sought-after addition to any local event calendar. 13. Pop-Up Bar Pop-up bars allow entrepreneurs to test bold ideas and short-term concepts without the commitment of a full lease. These temporary venues generate buzz and exclusivity through limited-time offers or collaborations. They’re perfect for trialling new menus or seasonal promotions before scaling into a permanent location. 14. Sober Bar Sober or “zero-proof” bars are redefining nightlife by offering non-alcoholic cocktails, mocktails, and premium alcohol-free options. These venues cater to mindful drinkers and focus on wellness, connection, and creativity. With interest in moderation and wellbeing growing, sober bars represent an innovative business model in Australia’s hospitality sector. Choosing the Right Bar for Your Business Every successful bar starts with a clear concept that connects with its audience. Whether you’re building a laid-back local spot or a high-end destination, success depends on aligning your vision, menu, atmosphere, and customer experience. To learn more about licensing, permits, and business planning for your venue, visit Business.gov.au’s guide to starting a bar. At Hospitality Connect, we help venue owners across Australia design and equip their spaces for success — from bar tools and refrigeration to furniture and fit-outs. With the right support and commercial equipment, your dream bar can become a profitable reality.

Preventing Dine and Dash in Your Venue: A Guide by Hospitality Connect
When a customer leaves without paying their bill, it doesn’t just mean lost revenue—it impacts your team’s morale, disrupts operations, and creates tension within your venue. At Hospitality Connect, we understand that preventing dine and dash incidents is a critical part of restaurant security, guest management, and overall loss prevention. Dine and dash incidents are unfortunately common, but with the right systems and staff training in place, you can significantly reduce the risk. Below, we’ve outlined expert strategies and industry best practices to help hospitality venues protect themselves—and maintain a safe, professional environment for both guests and staff. What Is Dine and Dash? Dine and dash refers to the act of leaving a restaurant or café without paying for a meal. It’s a form of theft that can seriously damage a venue’s reputation and bottom line. Beyond the immediate financial loss, repeat incidents can affect customer trust, staff confidence, and insurance costs. Is Dine and Dash Illegal? Yes. Dine and dash is a criminal offense—classified as “theft of services” or “defrauding an innkeeper.” Depending on the amount unpaid, the act can lead to fines or even imprisonment. Venues that experience recurring dine and dash incidents may also face higher operational risks, making proactive prevention essential. How to Stop Dine and Dash: Proven Strategies for Hospitality Businesses At Hospitality Connect, we work with venues across Australia to strengthen their operational systems. Here are some proven ways to reduce dine and dash incidents: 1. Train and Empower Your Team Train your staff to recognise suspicious behaviour and engage guests with confidence. A well-trained team that builds rapport with customers naturally discourages theft and fosters a welcoming environment. 2. Upgrade Security Systems Modern surveillance and smart POS integration can make a significant difference. Install discreet cameras at key entry and exit points, and use real-time monitoring tools to detect irregular transactions or guest movements. 3. Adapt Payment Processes Consider introducing pre-payment options, credit card holds, or QR-based ordering systems. Digital solutions not only streamline service but also reduce the opportunity for unpaid bills. 4. Use Front-of-House Oversight A visible host or floor manager near entry points adds a strong deterrent. They can greet guests, oversee traffic flow, and identify potential issues early. 5. Take Reservations with Verification Encourage reservations that collect guest contact details or payment information upfront. Not only does this enhance guest experience—it adds a protective layer for your business. 6. Rethink Your Floor Plan Improve sightlines and reduce blind spots so staff can easily monitor guest areas. Strategically position exits, registers, and service stations to make it harder for guests to leave unnoticed. What to Do If a Dine and Dash Occurs If a customer leaves without paying: Stay calm and gather details – Record the time, description, and table number, and review any security footage. Contact authorities promptly – Provide all collected evidence to assist with identification. Notify nearby venues – Alert local businesses to be on the lookout for repeat offenders. Review internal security procedures – Identify weak points in staffing, layout, or policy that allowed the incident to occur. Dine and Dash FAQ Is dine and dash a felony?It can be, depending on the amount stolen. Larger unpaid bills may qualify as felony theft under local laws. Are staff responsible for unpaid bills?Generally, no. Under most employment laws, employers cannot deduct losses from employee wages if it reduces pay below minimum wage. Is dine and dash common?Unfortunately, yes—especially in busy or understaffed venues. Consistent training, smart payment systems, and vigilant management greatly reduce risks. What about online orders?“Virtual dine and dash” cases—such as false non-delivery claims—are on the rise. Protect your venue by using digital proof-of-delivery systems and accurate order tracking. Strengthen Your Venue’s Security with Hospitality Connect At Hospitality Connect, we help hospitality businesses protect their revenue and reputation through smarter operations, security solutions, and staff training. Whether you run a café, restaurant, or hotel, we provide tools and guidance to make dine and dash a thing of the past.

The World’s Most Expensive Foods: Exploring Luxury Dining with Hospitality Connect
In a time when people are dining out less frequently but spending more intentionally, luxury dining experiences are on the rise. Today’s guests are trading quantity for quality — treating every meal as a special occasion. Whether you’re dreaming of how the world’s elite dine or looking for creative menu inspiration, exploring the world’s most expensive foods reveals insights into flavor, exclusivity, and innovation. At Hospitality Connect, we believe chefs and restaurateurs can take inspiration from global luxury ingredients to elevate everyday menus. From saffron and Wagyu beef to truffles and caviar, this guide explores the rare ingredients that define fine dining — and how you can capture their essence without exceeding your budget. Why Luxury Ingredients Matter In professional kitchens, luxury ingredients are about more than cost — they’re about craftsmanship, culture, and story. Each rare product carries a history of meticulous farming, harvesting, and refinement. Using them (or inspired alternatives) helps chefs craft memorable experiences that justify premium pricing and strengthen brand identity. For further reading on culinary trends and ingredient sourcing, explore Food Standards Australia New Zealand (FSANZ) and The Culinary Institute of America 🌸 1. Saffron — The Golden Spice of the World Harvested from the Crocus sativus flower, saffron is the world’s most expensive spice, costing between $5–$20 per gram. Its rich aroma and golden color elevate dishes like risotto, bouillabaisse, and Persian desserts. Affordable Alternative: Try turmeric or marigold petals for similar color and a warm, earthy flavor. 🥩 2. Wagyu Beef — The Ultimate in Buttery Perfection Japan’s Wagyu beef is renowned for its intricate marbling and tenderness. With prices reaching $150 per pound, it’s the benchmark of indulgence in steak and sushi dishes. Affordable Alternative: Australian Wagyu or premium ribeye can provide comparable flavor and texture. ☕ 3. Kopi Luwak Coffee — The World’s Most Exclusive Brew Sourced from beans naturally fermented by the Asian palm civet, Kopi Luwak coffee can exceed $300 per pound. The process creates a silky, low-acid coffee with caramel undertones. Affordable Alternative: Jamaican Blue Mountain or Ethiopian Yirgacheffe coffee offer exquisite flavor at a lower cost. 🐟 4. Bluefin Tuna — Oceanic Luxury A staple of high-end Japanese cuisine, Bluefin tuna sells for $200–$400 per pound. Its rich, buttery texture makes it prized for sashimi and sushi. Affordable Alternative: Yellowfin or albacore tuna deliver similar freshness and taste. 🐮 5. Kobe Beef — Japan’s Culinary Crown Jewel A rarer subset of Wagyu, Kobe beef is strictly regulated and highly sought-after, commanding $200–$500 per pound. Its balance of sweetness and fat makes it a top-tier delicacy. Affordable Alternative: USDA Prime or Australian Wagyu provide satisfying luxury without the price tag. 🐟 6. Beluga Caviar — The Taste of True Elegance Extracted from Beluga sturgeon, this caviar can cost up to $300 per ounce. Its creamy texture and nutty aftertaste embody refinement. Affordable Alternative: Paddlefish caviar or salmon roe deliver comparable elegance at a lower price point. 🍉 7. Densuke Watermelon — Japan’s Sweet Black Gem With its glossy black rind and honey-sweet interior, the Densuke watermelon from Hokkaido can sell for $250 each. Grown in limited quantities, it’s a collector’s fruit. Affordable Alternative: Try Crimson Sweet or Sugar Baby watermelons for similar sweetness and presentation. 🍖 8. Iberico Ham — Spain’s Finest Delicacy Spain’s Jamón Ibérico comes from acorn-fed Iberian pigs and costs around $80–$110 per pound. Its melt-in-your-mouth texture and nutty flavor define European charcuterie. Affordable Alternative: Serrano ham or prosciutto are excellent, more accessible substitutes. ✨ 9. Edible Gold — The Art of Luxury Plating Used to decorate desserts and cocktails, edible gold leaf is priced at $2.50 per sheet. Though flavorless, it adds unmatched glamour and sophistication to plating. Affordable Alternative: Edible silver leaf or pearl dust provide sparkle with less expense. 🍄 10. White Alba Truffles — The Diamond of the Kitchen Found only in Italy’s Piedmont region, White Alba truffles can exceed $300 per ounce. Their intoxicating aroma enhances pasta, risotto, and eggs with earthy luxury. Affordable Alternative: Use truffle oil, truffle salt, or black truffles for a similar sensory experience. Tools for Precision and Presentation At Hospitality Connect, we know that even the finest ingredients deserve precision tools. Explore our range of professional-grade kitchen equipment designed for performance, consistency, and presentation — from chef knives and utensils to serving ware and bar accessories that elevate the luxury dining experience. Equip your kitchen with premium tools trusted by Australian hospitality professionals.👉 Explore Hospitality Connect’s Premium Equipment Range Expert Tips for Creating Luxury Dining Experiences Focus on presentation: Use fine tableware, lighting, and plating to communicate value. Tell ingredient stories: Educate diners about origins and craftsmanship to enhance perceived worth. Blend premium with practical: Combine luxury highlights with locally sourced produce to manage cost. Train for precision: Ensure kitchen teams maintain consistency in plating and portioning. Incorporate sensory appeal: Pair flavors with textures, aromas, and visuals for a multisensory experience. FAQs: Luxury Dining and Ingredient Substitutions What makes an ingredient “luxury”?Rarity, craftsmanship, and exclusivity. Ingredients like truffles or Wagyu require specific climates, care, and time. Can I make fine dining affordable?Yes. Focus on creativity, presentation, and quality substitutes — not just cost. Where can I source premium culinary tools in Australia?Visit Hospitality Connect for Australian-standard hospitality equipment, including utensils, kitchenware, and bar tools trusted by professionals nationwide. Conclusion: Elevate Your Menu, Inspire Your Guests Luxury dining isn’t just about indulgence — it’s about experience, precision, and passion. By learning from the world’s most expensive ingredients and using professional tools, chefs can transform any dish into a statement of excellence. At Hospitality Connect, we’re proud to support Australia’s culinary professionals with high-quality commercial kitchen equipment, barware, and fine dining essentials that empower creativity and performance. For more culinary insights, visit Hospitality Connect — your trusted partner in professional kitchen solutions. 🔗 External References External References: Food Standards Australia New Zealand | The Culinary Institute of Australia